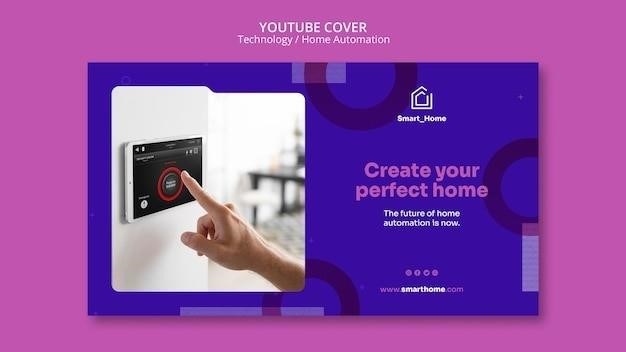
Amana Smart Thermostat Installation⁚ A Comprehensive Guide
This guide provides a step-by-step walkthrough for installing your Amana smart thermostat; Learn how to wire your thermostat correctly‚ connect it to Wi-Fi‚ and set up the Amana Home app for seamless control. Discover advanced features and troubleshoot common installation problems.
Getting Started⁚ Pre-Installation Checklist
Before you begin installing your Amana smart thermostat‚ gather the necessary tools and materials. You’ll need a Phillips head screwdriver‚ wire strippers‚ a voltage tester (to ensure power is off)‚ and potentially a C-wire adapter if your existing wiring doesn’t include one. Consult your Amana smart thermostat’s user manual for a complete list of specific requirements. Take photos of your existing wiring configuration before disconnecting anything; this will be invaluable if you encounter problems.
Next‚ turn off the power to your HVAC system at the breaker box. This is crucial for your safety and prevents accidental shocks or damage to your equipment. Double-check that the power is off using your voltage tester before proceeding. Locate your existing thermostat and carefully remove it from the wall plate. Examine the existing wiring carefully‚ noting the color and location of each wire. This information will be essential when connecting your new Amana smart thermostat. If you’re uncertain about any aspect of the wiring‚ consult a qualified HVAC technician. Thorough preparation ensures a smooth and safe installation process.
Wiring Your Amana Smart Thermostat
Carefully examine the wiring diagram provided with your Amana smart thermostat. This diagram will show you which wires connect to which terminals on the thermostat. Match the wires from your existing thermostat to the corresponding terminals on the new Amana thermostat. Common wire colors include red (R)‚ green (G)‚ yellow (Y)‚ white (W)‚ and blue (B) for heating and cooling stages. A “C” wire provides constant power to the thermostat‚ essential for many smart features; if absent‚ a C-wire adapter may be necessary. Ensure that all wire connections are secure and that no wires are loose or exposed.
If your system has multiple heating or cooling stages (e.g.‚ heat pump with auxiliary heat)‚ carefully follow the wiring instructions specific to your HVAC system. Incorrect wiring can lead to malfunction or even damage to your equipment. If you’re unsure about the correct wiring configuration‚ consult your Amana smart thermostat’s manual or seek professional assistance from a qualified technician. Once all wires are securely connected‚ carefully tuck them into the wall cavity‚ ensuring they don’t interfere with the thermostat’s mounting.
Before powering the system back on‚ visually inspect all connections one last time to ensure everything is correctly wired. This step helps prevent future problems and ensures the proper functioning of your Amana smart thermostat;
Connecting to Wi-Fi and the Amana Home App
With your Amana smart thermostat wired and powered‚ the next step is establishing a Wi-Fi connection. On the thermostat’s display‚ navigate to the Wi-Fi settings menu. This usually involves pressing a specific button or using the touchscreen interface. Your thermostat will likely display a list of available Wi-Fi networks. Select your home’s network and enter the password. Ensure your device’s Wi-Fi signal is strong and stable near the thermostat’s location for optimal connection. A weak signal may lead to connectivity issues and unreliable operation. If your Wi-Fi network is secured with a complex password‚ double-check its accuracy during input. Incorrect entry will prevent the thermostat from connecting.
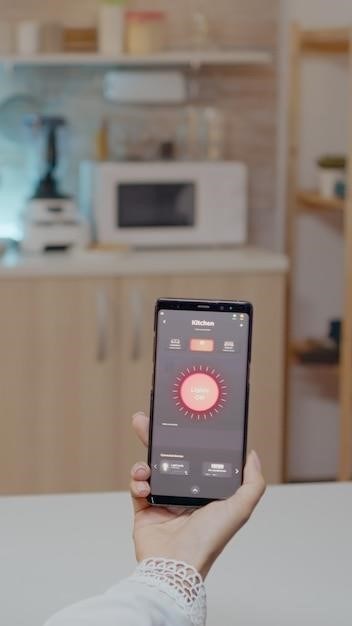
Download the Amana Home app from the Google Play Store (Android) or the Apple App Store (iOS). Create an account or log in if you already have one. The app will guide you through the pairing process with your newly installed thermostat. This usually involves entering a unique code displayed on the thermostat’s screen into the app. Once paired‚ the app will provide access to various features‚ including temperature control‚ scheduling‚ and advanced settings. If pairing fails‚ check your Wi-Fi connection‚ network password‚ and that the thermostat is receiving power. Refer to the Amana Home app’s troubleshooting section for additional assistance.
After a successful connection‚ test the remote control functionality of the app. Adjust the temperature setting on your phone and observe if the thermostat accurately reflects the changes. This confirms the seamless integration between your thermostat and the Amana Home app.
Setting Up Your Amana Smart Thermostat
Once your Amana smart thermostat is connected to Wi-Fi and the Amana Home app‚ you can begin personalizing its settings. The initial setup usually involves selecting your heating and cooling system type (e.g.‚ heat pump‚ gas furnace). Accurate selection ensures the thermostat functions correctly with your HVAC system. The app will guide you through this process‚ often using a series of on-screen prompts and system-specific options. Incorrect configuration can lead to malfunctions or inaccurate temperature readings. Carefully review the available choices and ensure they align with your HVAC system’s specifications. Refer to your HVAC system’s documentation for clarification if needed.
Next‚ set your preferred temperature units (Celsius or Fahrenheit) and time format. You can also customize the display settings‚ such as brightness and backlight duration. These preferences enhance the usability of your thermostat. Consider the lighting conditions in your home when adjusting the brightness setting. A dimmer setting might be preferable in brightly lit rooms. Configure the backlight duration based on your individual preferences‚ balancing ease of viewing with energy conservation. Experiment with different settings to find the optimal balance for your needs and environment.
Finally‚ schedule your desired heating and cooling preferences. The Amana Home app allows you to create custom schedules based on your daily routines and preferences. This feature promotes energy efficiency and maintains a comfortable indoor temperature throughout the day. Begin by setting periods for higher temperatures during occupied hours and lower temperatures during unoccupied hours. Regularly review and adjust your schedule as needed to optimize energy usage and comfort.
Using Voice Control with Amazon Alexa
Integrating your Amana smart thermostat with Amazon Alexa provides convenient voice control over your home’s climate. After completing the initial setup within the Amana Home app‚ you’ll need to link your Amana account to your Amazon Alexa app. This process usually involves enabling the Amana skill within the Alexa app and authorizing access to your Amana account. Follow the on-screen instructions carefully; they will guide you through the necessary steps. Ensure both your thermostat and your mobile device are connected to the same Wi-Fi network for optimal connectivity. Problems linking accounts often stem from network connectivity issues.
Once linked‚ you can control your thermostat using simple voice commands. For example‚ you can say‚ “Alexa‚ set the thermostat to 72 degrees‚” or “Alexa‚ turn the thermostat to cool.” Alexa will respond by adjusting your thermostat’s settings accordingly. The specific commands may vary slightly‚ depending on your thermostat model and the way you’ve named the device in the app. Experiment with different phrasing to find the commands that work best for you and your device. Remember to clearly state the name you’ve assigned your thermostat in the Amana app‚ if you’ve customized it from the default.
Alexa’s voice control functionality extends beyond simple temperature adjustments. You can also use voice commands to switch between heating‚ cooling‚ and auto modes. This hands-free control is particularly useful when your hands are full or when you’re unable to directly interact with the thermostat. Ensure that your Alexa device is within hearing range of your voice and properly connected to your Wi-Fi network to ensure successful voice commands. If you encounter issues with voice control‚ check the network connectivity of both your Alexa device and your thermostat.
Troubleshooting Common Installation Issues
During Amana smart thermostat installation‚ several issues might arise. Incorrect wiring is a frequent problem. Double-check all wire connections to ensure they match the wiring diagram provided in your thermostat’s manual; A common mistake is mismatching the wires from the thermostat to the HVAC system‚ leading to malfunction. If your system isn’t recognized‚ review the wiring carefully‚ and consult the wiring diagram for your specific HVAC model. Using the wrong type of wire can also cause problems.
Connectivity problems can stem from Wi-Fi issues. Verify that your router is functioning correctly and that your thermostat is within range of the Wi-Fi signal. Weak signals often result in connection failures. Restarting both your router and your thermostat can resolve temporary glitches. Ensure your smartphone or tablet is also connected to the same Wi-Fi network for seamless app integration. If the problem persists‚ check the network settings on your thermostat and ensure you’ve entered the correct Wi-Fi password.
If your thermostat displays error messages‚ consult the troubleshooting section of your user manual. These messages often provide clues about the specific problem. For example‚ a communication error typically indicates a wiring or connectivity issue. If you can’t resolve the issue using the manual‚ contact Amana customer support for further assistance. They can provide expert guidance and help diagnose more complex problems. Remember to keep your installation manual handy for quick reference to solve common problems.
Advanced Features and Settings
Beyond basic temperature control‚ your Amana smart thermostat offers several advanced features accessible through the Amana Home app. Explore scheduling options for precise temperature control throughout the day and week. Create custom schedules tailored to your lifestyle‚ optimizing energy efficiency and comfort. Utilize geofencing to automatically adjust temperatures based on your location‚ ensuring your home is comfortable when you’re near and energy-saving when you’re away. This feature often requires enabling location services on your smartphone.
Dive into the settings menu to personalize your thermostat’s behavior. Adjust the fan settings to optimize air circulation. Choose between auto‚ on‚ or off modes to suit your preferences. Fine-tune the temperature increments for precise adjustments. Many models offer options for adjusting the display brightness and even the background image. Customize these to match your décor and personal preferences.
Explore the advanced settings for system diagnostics. Access information about your HVAC system’s performance. Monitor energy usage to identify areas for potential savings. Some models offer features such as humidity control and integration with other smart home devices. Consult your user manual to fully explore the capabilities specific to your Amana smart thermostat model. Regularly reviewing the advanced settings and features allows you to maximize comfort and energy efficiency.
Managing Multiple Thermostats
The Amana Home app simplifies managing multiple Amana smart thermostats within your home. After installing each thermostat and completing the initial setup‚ they will appear listed within the app. This centralized dashboard provides a convenient overview of the temperature settings and status of all your thermostats. You can easily switch between thermostats to adjust individual settings‚ offering precise control over each room or zone.
The app allows you to create custom names for each thermostat to easily distinguish them. For example‚ label them “Living Room‚” “Master Bedroom‚” or “Upstairs.” This improves clarity and simplifies navigation when managing numerous devices. You can also set different schedules for each thermostat to accommodate varying needs across the house. The app enables remote control‚ allowing you to make adjustments from anywhere with an internet connection‚ ensuring consistent comfort throughout your home.
Group thermostats together for convenient management. This feature is particularly useful for controlling temperatures in similar areas or for creating zone-based control. For instance‚ group all the thermostats on the first floor to simultaneously adjust the temperature in those rooms. The Amana Home app provides a user-friendly interface to add‚ remove‚ rename‚ and organize your thermostats efficiently. The app keeps you informed of any connectivity issues or errors with any of your registered thermostats.
Using the Amana Homeowner Guide
The Amana Homeowner Guide serves as your comprehensive resource for understanding and utilizing all features of your Amana smart thermostat. This guide‚ often available as a downloadable PDF or accessible online‚ provides detailed explanations of the thermostat’s functionalities and settings. It’s designed to help you navigate the user interface and master the various control options.
Within the homeowner guide‚ you’ll find step-by-step instructions for setting up schedules‚ adjusting temperature preferences‚ and utilizing advanced features like voice control integration. Clear diagrams and illustrations simplify complex procedures‚ helping you to easily understand and configure your thermostat. The guide also covers troubleshooting common issues‚ offering solutions to potential problems you might encounter during operation.
The guide details how to access and utilize the various menus and settings within the thermostat’s interface. It explains the different modes of operation‚ such as heating‚ cooling‚ and auto‚ and how to switch between them. You’ll find information on how to customize settings to match your personal comfort preferences and energy efficiency goals. Regularly consulting the homeowner guide helps you maximize your thermostat’s potential and ensure optimal performance.
Safety Precautions During Installation
Before beginning the installation of your Amana smart thermostat‚ prioritize safety by turning off the power to your HVAC system at the breaker box. This crucial step prevents electrical shock and ensures a safe working environment. Failure to do so could result in serious injury or damage to the equipment.
When working with electrical wiring‚ use caution and avoid touching bare wires. If unsure about any wiring connections‚ consult a qualified HVAC technician. Incorrect wiring can lead to malfunctions or even damage to your HVAC system. Always double-check your connections before restoring power.
Ensure proper ventilation during installation‚ particularly in confined spaces. Poor ventilation can lead to carbon monoxide poisoning or other hazardous conditions. If you encounter any difficulties during the installation process‚ do not hesitate to seek assistance from a professional HVAC technician. Their expertise can prevent potential hazards and ensure a successful installation.
Handle the thermostat with care to avoid damage. Avoid dropping or applying excessive force‚ which can compromise its functionality. Keep the installation area clean and free of obstructions. After installation‚ dispose of packaging materials responsibly.